Overview - Integrating with Inscribe via API
A visual overview of typical integrations with Inscribe
Overview
When integrating with Inscribe via API, the first step is uploading documents into Inscribe. Here's an overview of the typical workflow:
- Upload documents that live in your system of record - this is often a Loan Origination System ("LOS"), a Customer Relationship Management software ("CRM", like Salesforce), a case management software, customer support software (like Zendesk), or homegrown software for processing customer applications.
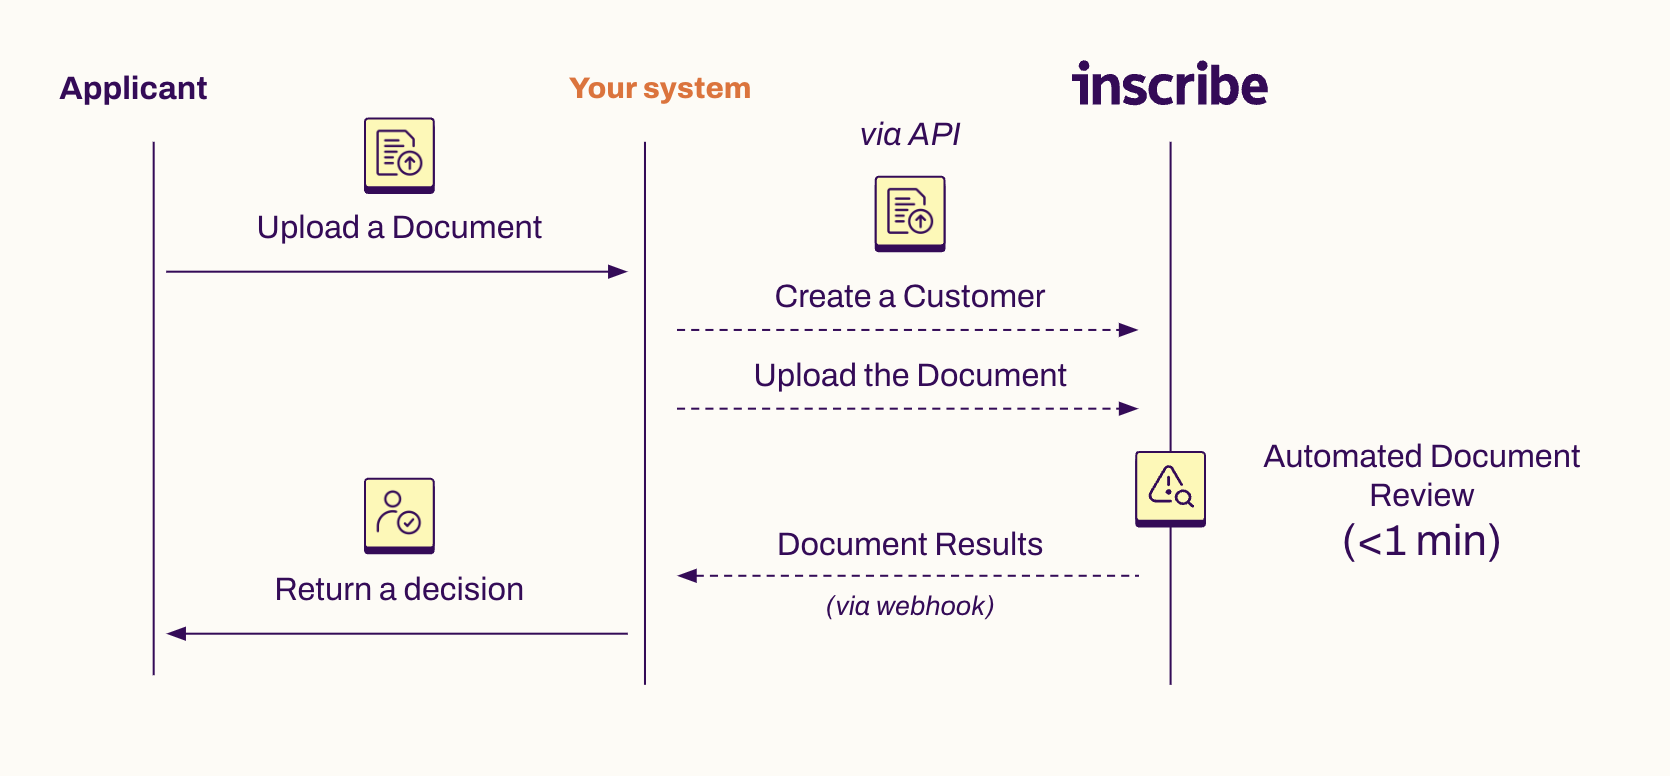
After documents are uploaded to Inscribe, our system will process them.
Depending on features you purchase from Inscribe, processing may involve several steps, including:
- reviewing the documents for signals of fraud,
- processing the text in the document to verify key details,
- and performing KYC/KYB research on the individuals or business entities referenced in the document.
Finally, the document results can be returned via webhook automatically, or your system can poll for the results (our recommendation is to handle the webhooks if possible - this reduces load on your system and ours). The payload with the document results mirror the response from this endpoint.
UX Enhancements
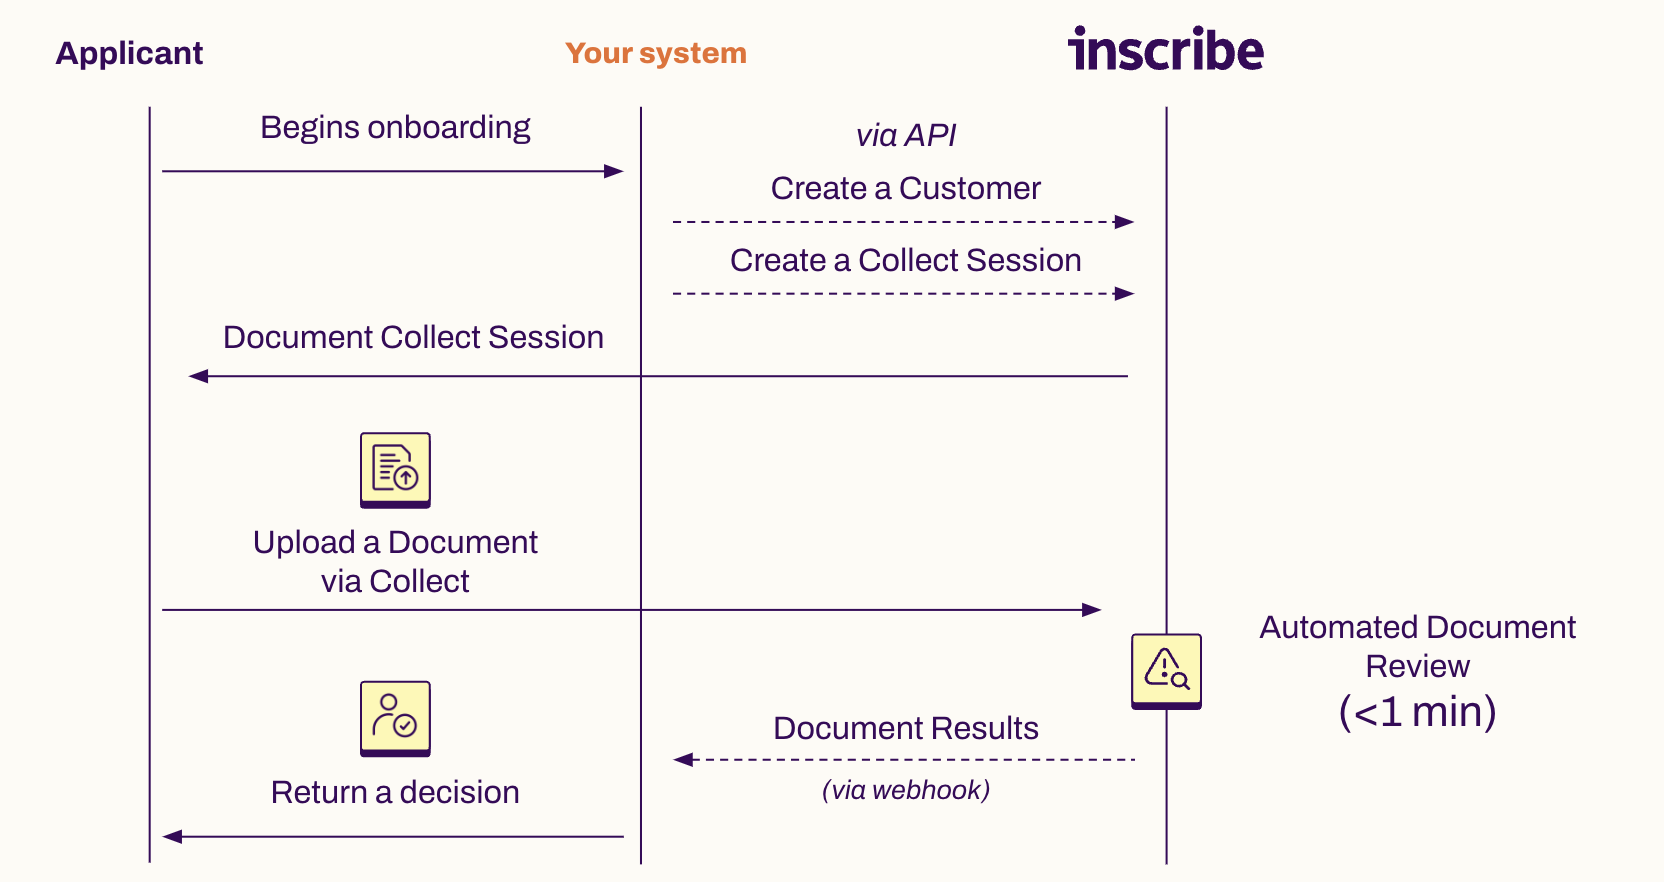
Streamlined document collection with Inscribe Collect
- Accept document uploads with Inscribe's Collect feature, a customizable document collection portal to accept documents from customers, which we can send to the customer on your behalf or can be embedded directly into your application for a seamless user journey.
Custom document collection
-
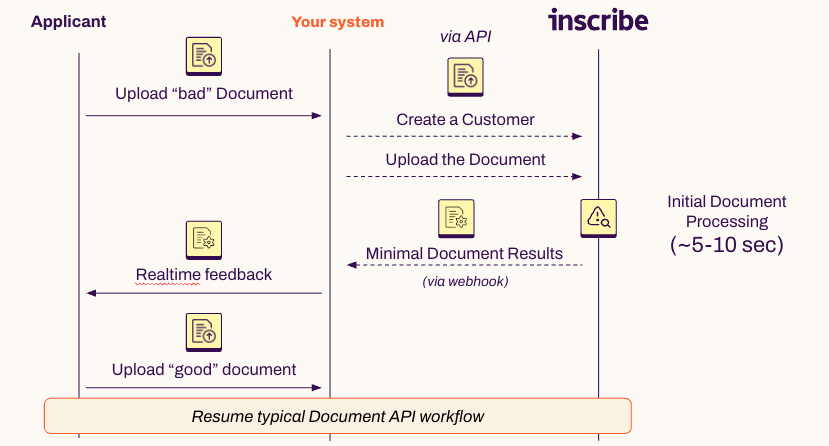
Use Inscribe's "Document progress" webhook event to provide quick feedback to a user, who may or may have not submitted the right document. This event will include several pieces of useful information about the document, including:
- Document Type classification (bank statement, payslip, utility bill, etc.)
- File type (True PDF, image, etc.)
- Language
- Parsed Details (name, address, date, etc.)
-
With this information, you can quickly determine whether the user uploaded a document that meets your various business rules.
- For example, your business may only accept Bank Statements from the last 90 days, but a user might submit a statement that's 6 months old. In near realtime, your UI could alert the customer that they need to upload a new document, saving time and improving customer experience.
- This is often compared to an experience where a customer support or underwriting team would have to manually reach out to that user via email, delaying the next steps in the review workflow by hours or days.
- This implementation can improve conversion rates and customer experience, by offering clear feedback early in your document collection workflow.
Updated 9 months ago
What’s Next
Now that you understand the integration at a high level, let's dive into some code samples.