Getting Started with Collect
This feature is currently in Beta. The contents of this page may change as updates are released.
Collect must be enabled by Inscribe for your account before results are available. You can contact Inscribe via Intercom or by emailing [email protected] to inquire about enabling the service. To find out more about the Collect settings that can configured, check out our help guide on Setting up Collect.
Collect is an end-to-end document collection tool. It allows you to request documents from an applicant, manage document collection via a session web portal and create decision logic to automatically accept, reject or send the document for manual review.
Quickstart
To learn how to quickly integrate Collect into your application using the API, follow the Collect Quickstart Recipe.
Overview
Collect is designed to deliver the most value when used via the API for automated workflows. However, it is also possible to get started with Collect for manual workflows using the web app. This guide only discusses using Collect via the API. For more information on using Collect via the web app, visit our help article for Getting started with Collect.
What is a Collect Session?
A Collect session is a unique collection object that can be used to collect requested documents from a customer.
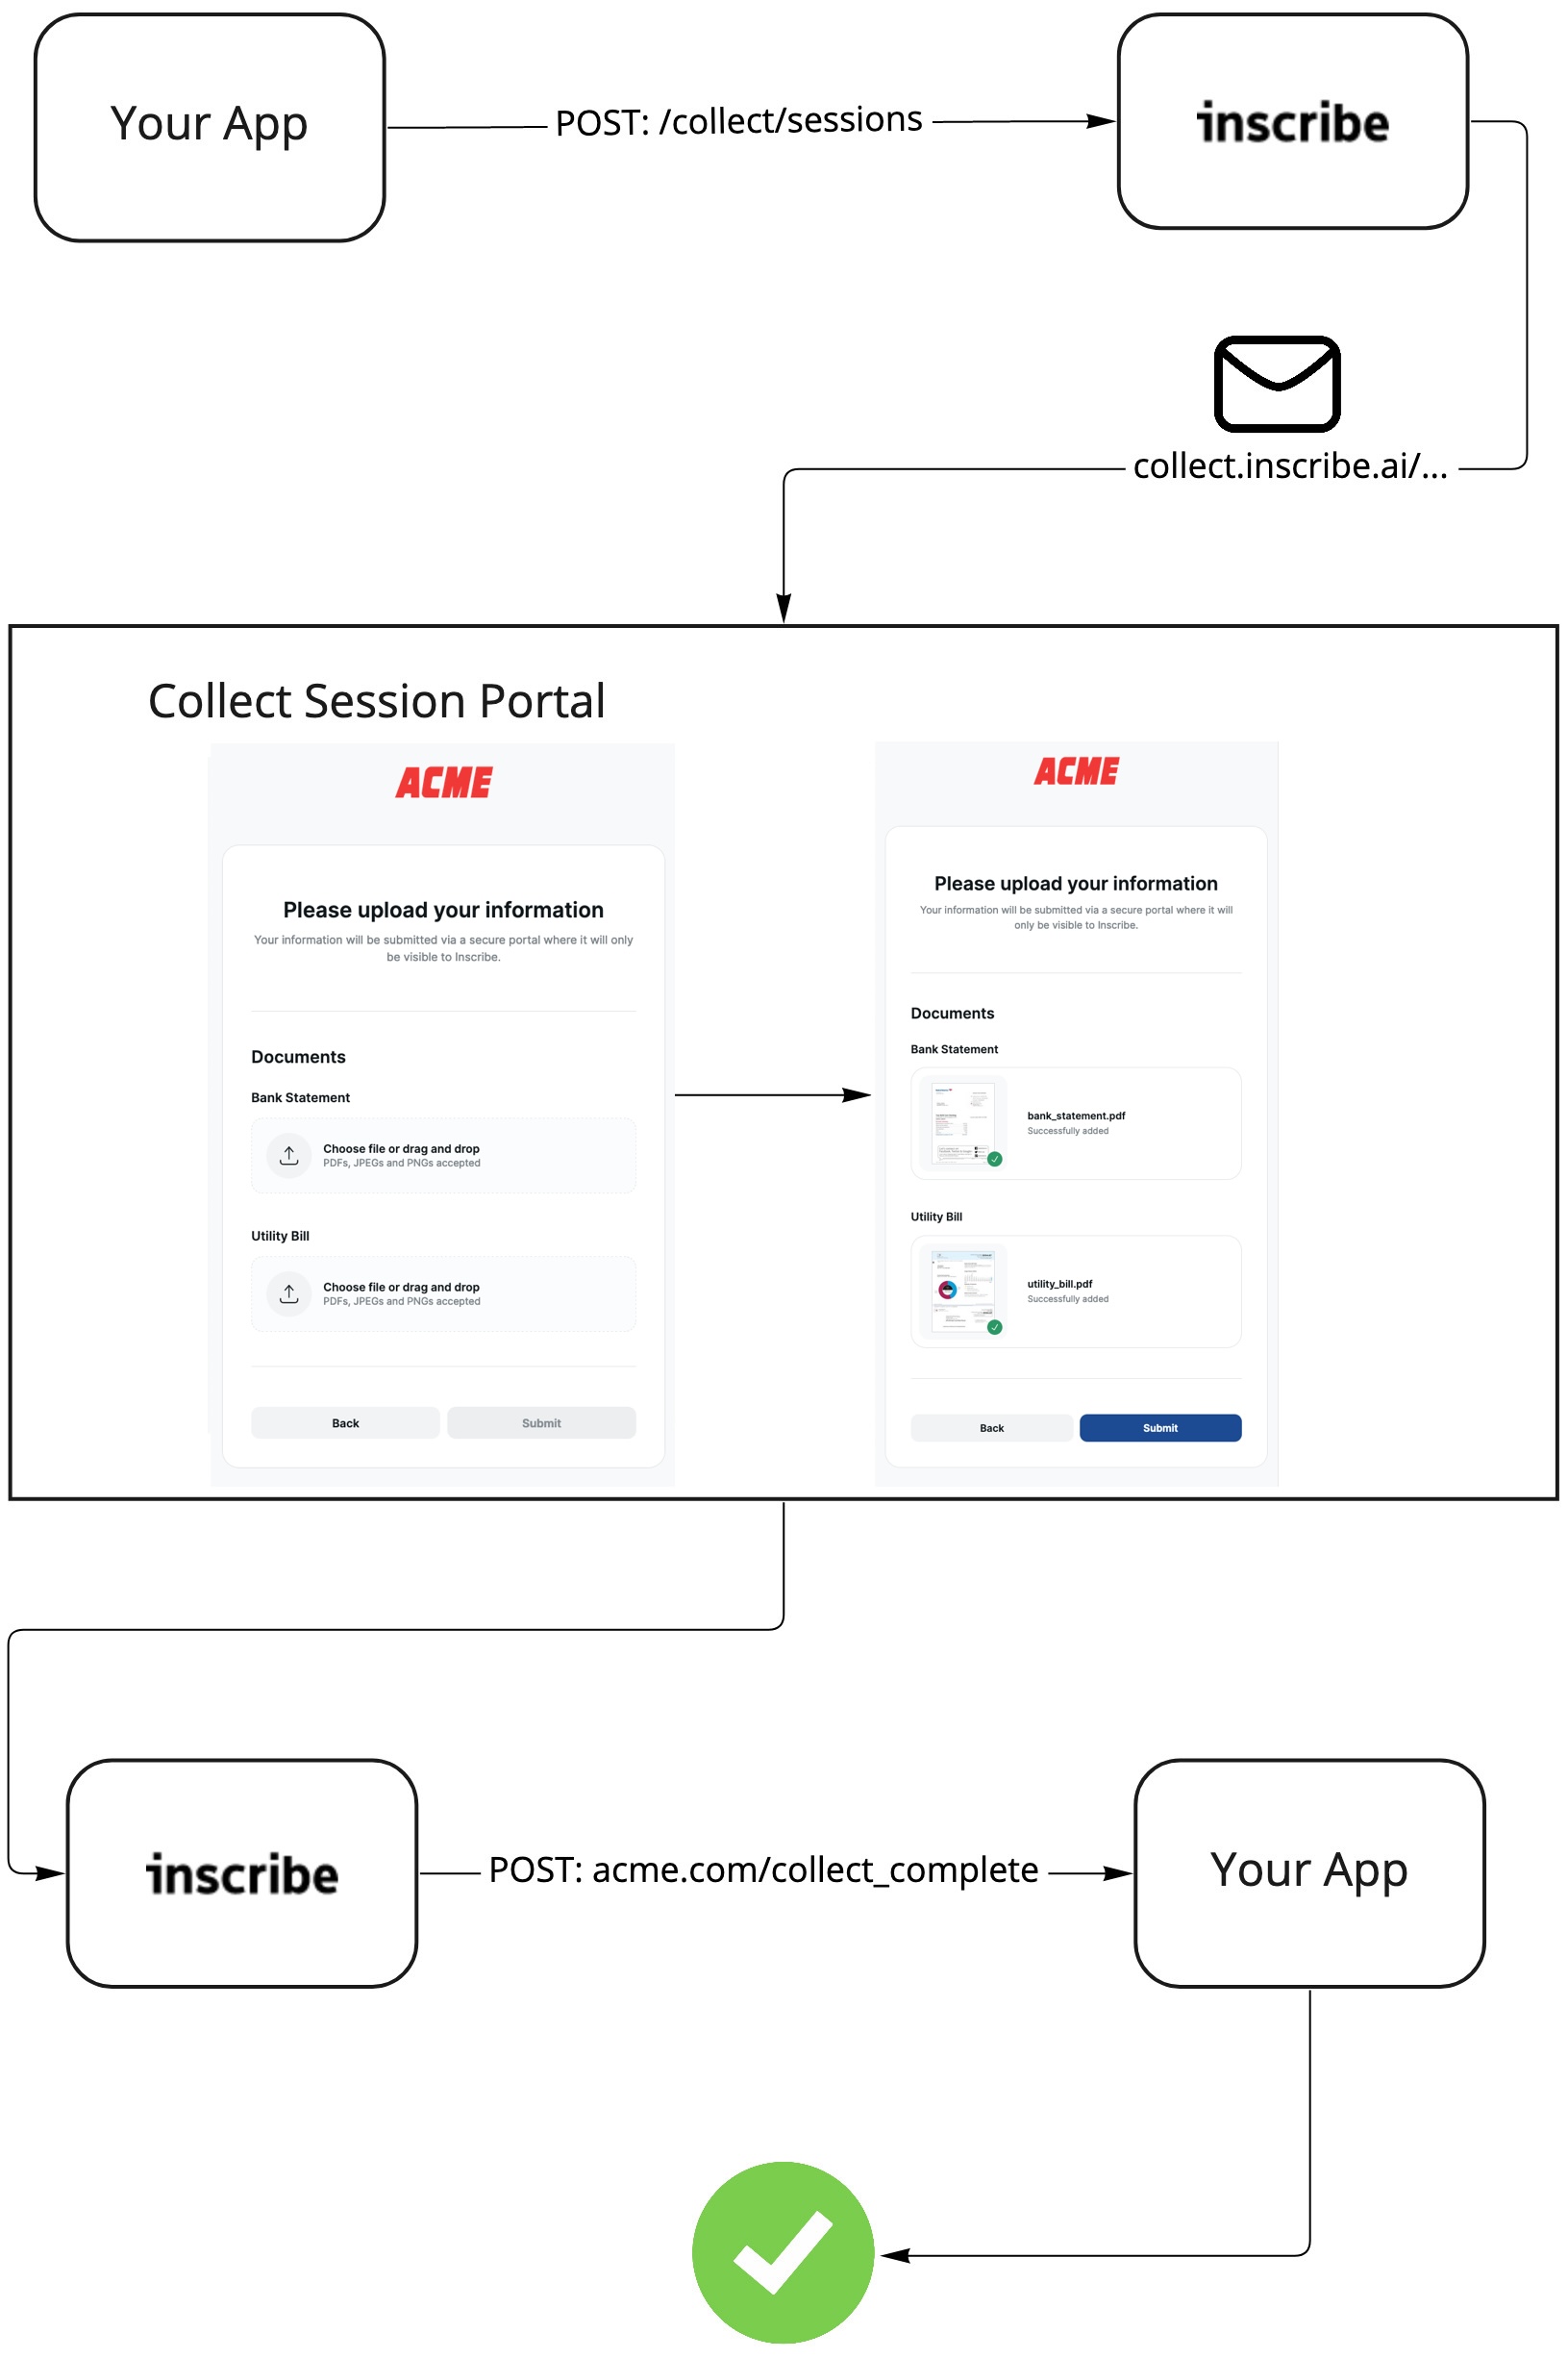
Collect Session Flow
The session flow begins when you require documents from a customer.
- Create a session: use the /collect/sessions endpoint to create a collect session to request documents from the customer. A shareable portal link will be created at collect.inscribe.ai/:id that the customer can use to submit the requested documents.
- Get submitted documents: poll the /collect/sessions endpoint or set up a webhook to implement a callback when the customer has successfully submitted the documents.
- Approve the customer: you can create custom actions such as approve, reject or manual review triaging based on the documents collected from the session.
The diagram below shows a model of how a session can be used to collect documents from a customer.
Working with Collect Sessions
Create a Collect Session
A session can be created via the /collect/sessions endpoint. Each Collect session may include:
customerwith either a customernameor customeridand, anemailif you wish for the session portal link to be sent via emailsend_emailflag set totrueif you wish for the session portal link to be sent via emaildocument_requests, a list of documents required from the customersuccess_urlif you wish to redirect the customer to a certain webpage when they complete the session. If none is provided, it will default to the default success URL for your organization.cancel_urlif you wish to redirect the customer to a certain webpage when they cancel the session. If none is provided, it will default to the default cancel URL for your organization.
{
  "customer": {
    "id": "062d3890-f15e-47de-8b02-c38f1f8b4a3a",
    "email": "[email protected]"
  },
	"send_email": false,
  "document_requests": [
    {
      "label": "Bank statement",
      "max_documents": 1,
      "tags": [{"text": "proof-of-address-bank-statement"}],
      "verify": {
        "name": "Charles Ponzi",
        "address": "123 Fake Street",
        "id_number": "12-1234567"
      }
    },
    {
      "label": "Utility bill",
      "max_documents": 1,
      "tags": [{"text": "proof-of-address-utility-bill"}]
    }
  ]
}
Document Requests
A document request is a unique type of document you wish to collect from a customer. Each Collect session can contain many document requests. Each request may include:
label, a unique name for the request- an optional
descriptionto appear beneath the request label max_documentsif you wish to accept a varying number of documents for the requesttagsthat will be given to any documents the customer submits for that requestverifyif you wish to verify key details from submitted documents
{
  "label": "Bank statement",
  "description": "A bank statement from within the last 90 days"
	"max_documents": 1,
  "tags": [{"text": "proof-of-address-bank-statement"}],
  "verify": {
    "name": "Charles Ponzi",
    "address": "123 Fake Street",
    "id_number": "12-1234567"
  }
}
Verification
You can perform verification of the name, address, company name, ID number or of any arbitrary string by including a verify object in a document request.
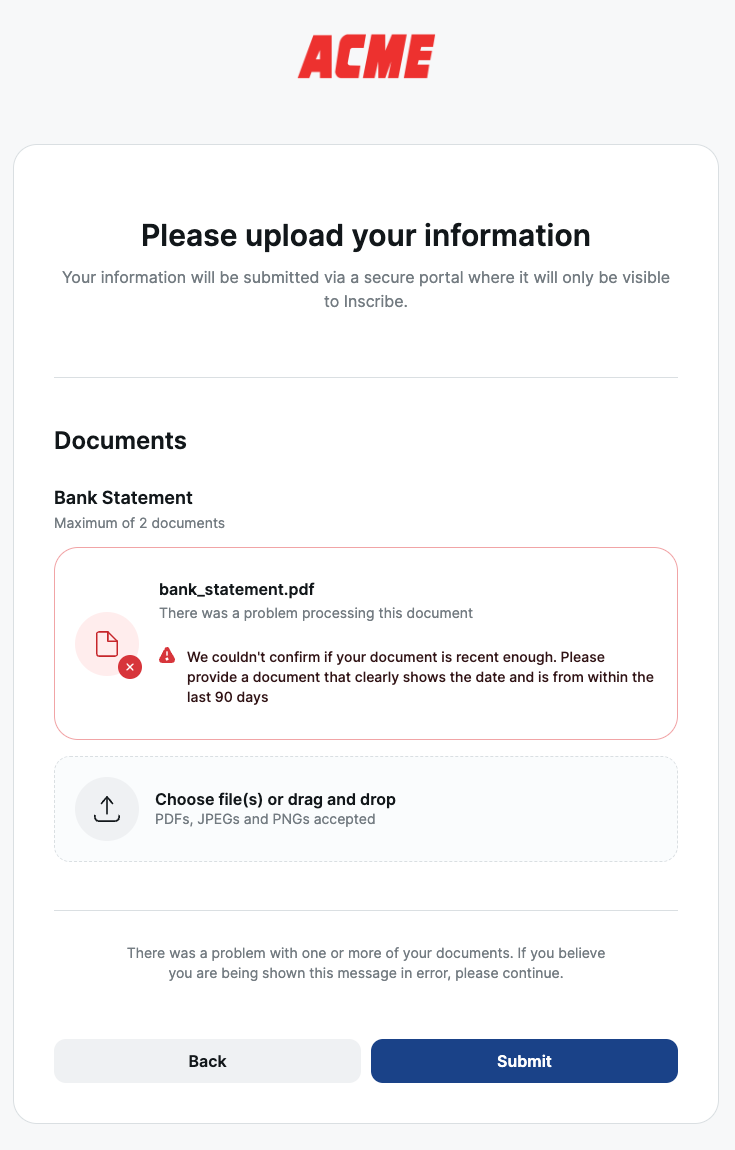
If the document does not pass verification, the customer will be informed on the Collect session page and prompted to upload a document that correctly matches the input. This can be particularly useful if Collect is being used as part of a customer onboarding workflow where a Collect session is used to verify customer details.

Using Checks in a Session
In addition to verification, you can use Collect together with Inscribe Checks to ensure that submitted documents are correct. Checks allow you to define properties that a submitted document must have to be accepted by a document request.
Checks can be created via the web app only. To use Checks with Collect:
- Create the Check you wish to be applied to the document request.
- Set the Check document filter condition to require the presence of a tag that is unique to a document in that document request.
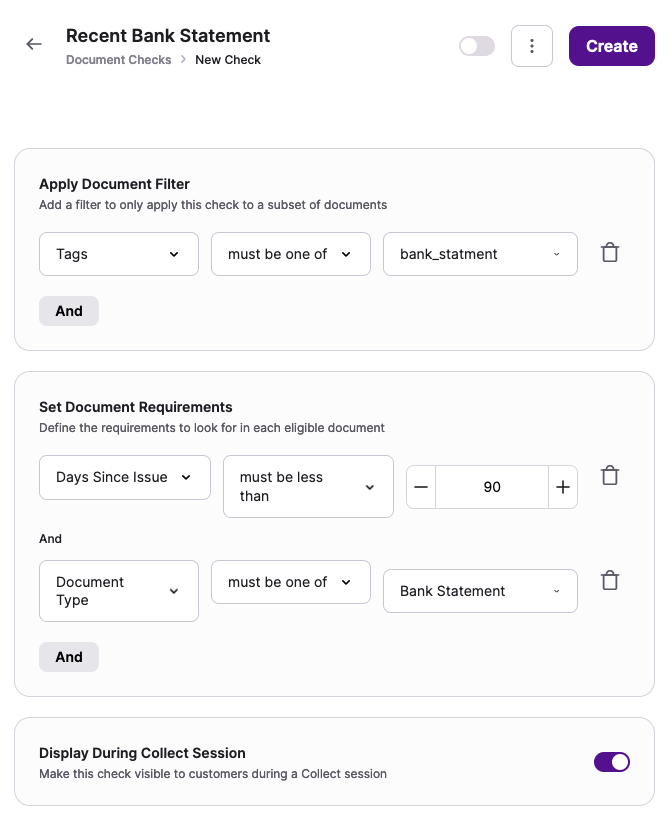
- If you wish for the check state to appear in the Collect session page to the customer, ensure that the following toggle is selected:

When the toggle is selected, documents that fail the Check will appear with an error stating what was expected.
Collect Session Webhooks
Inscribe provides a collect_session.complete webhook type for Collect sessions. When a session is successfully completed, the resulting Collect session object as seen in the Collect Session Response will be sent to the provided webhook URL. To find out more about setting up a webhook for Collect session completions, you can visit our guide for Getting Started with Webhooks.
Update a Collect Session
Sometimes further documents may need to be requested from a customer. If this is the case, either a new session can be created for the same customer or the existing session can be updated.
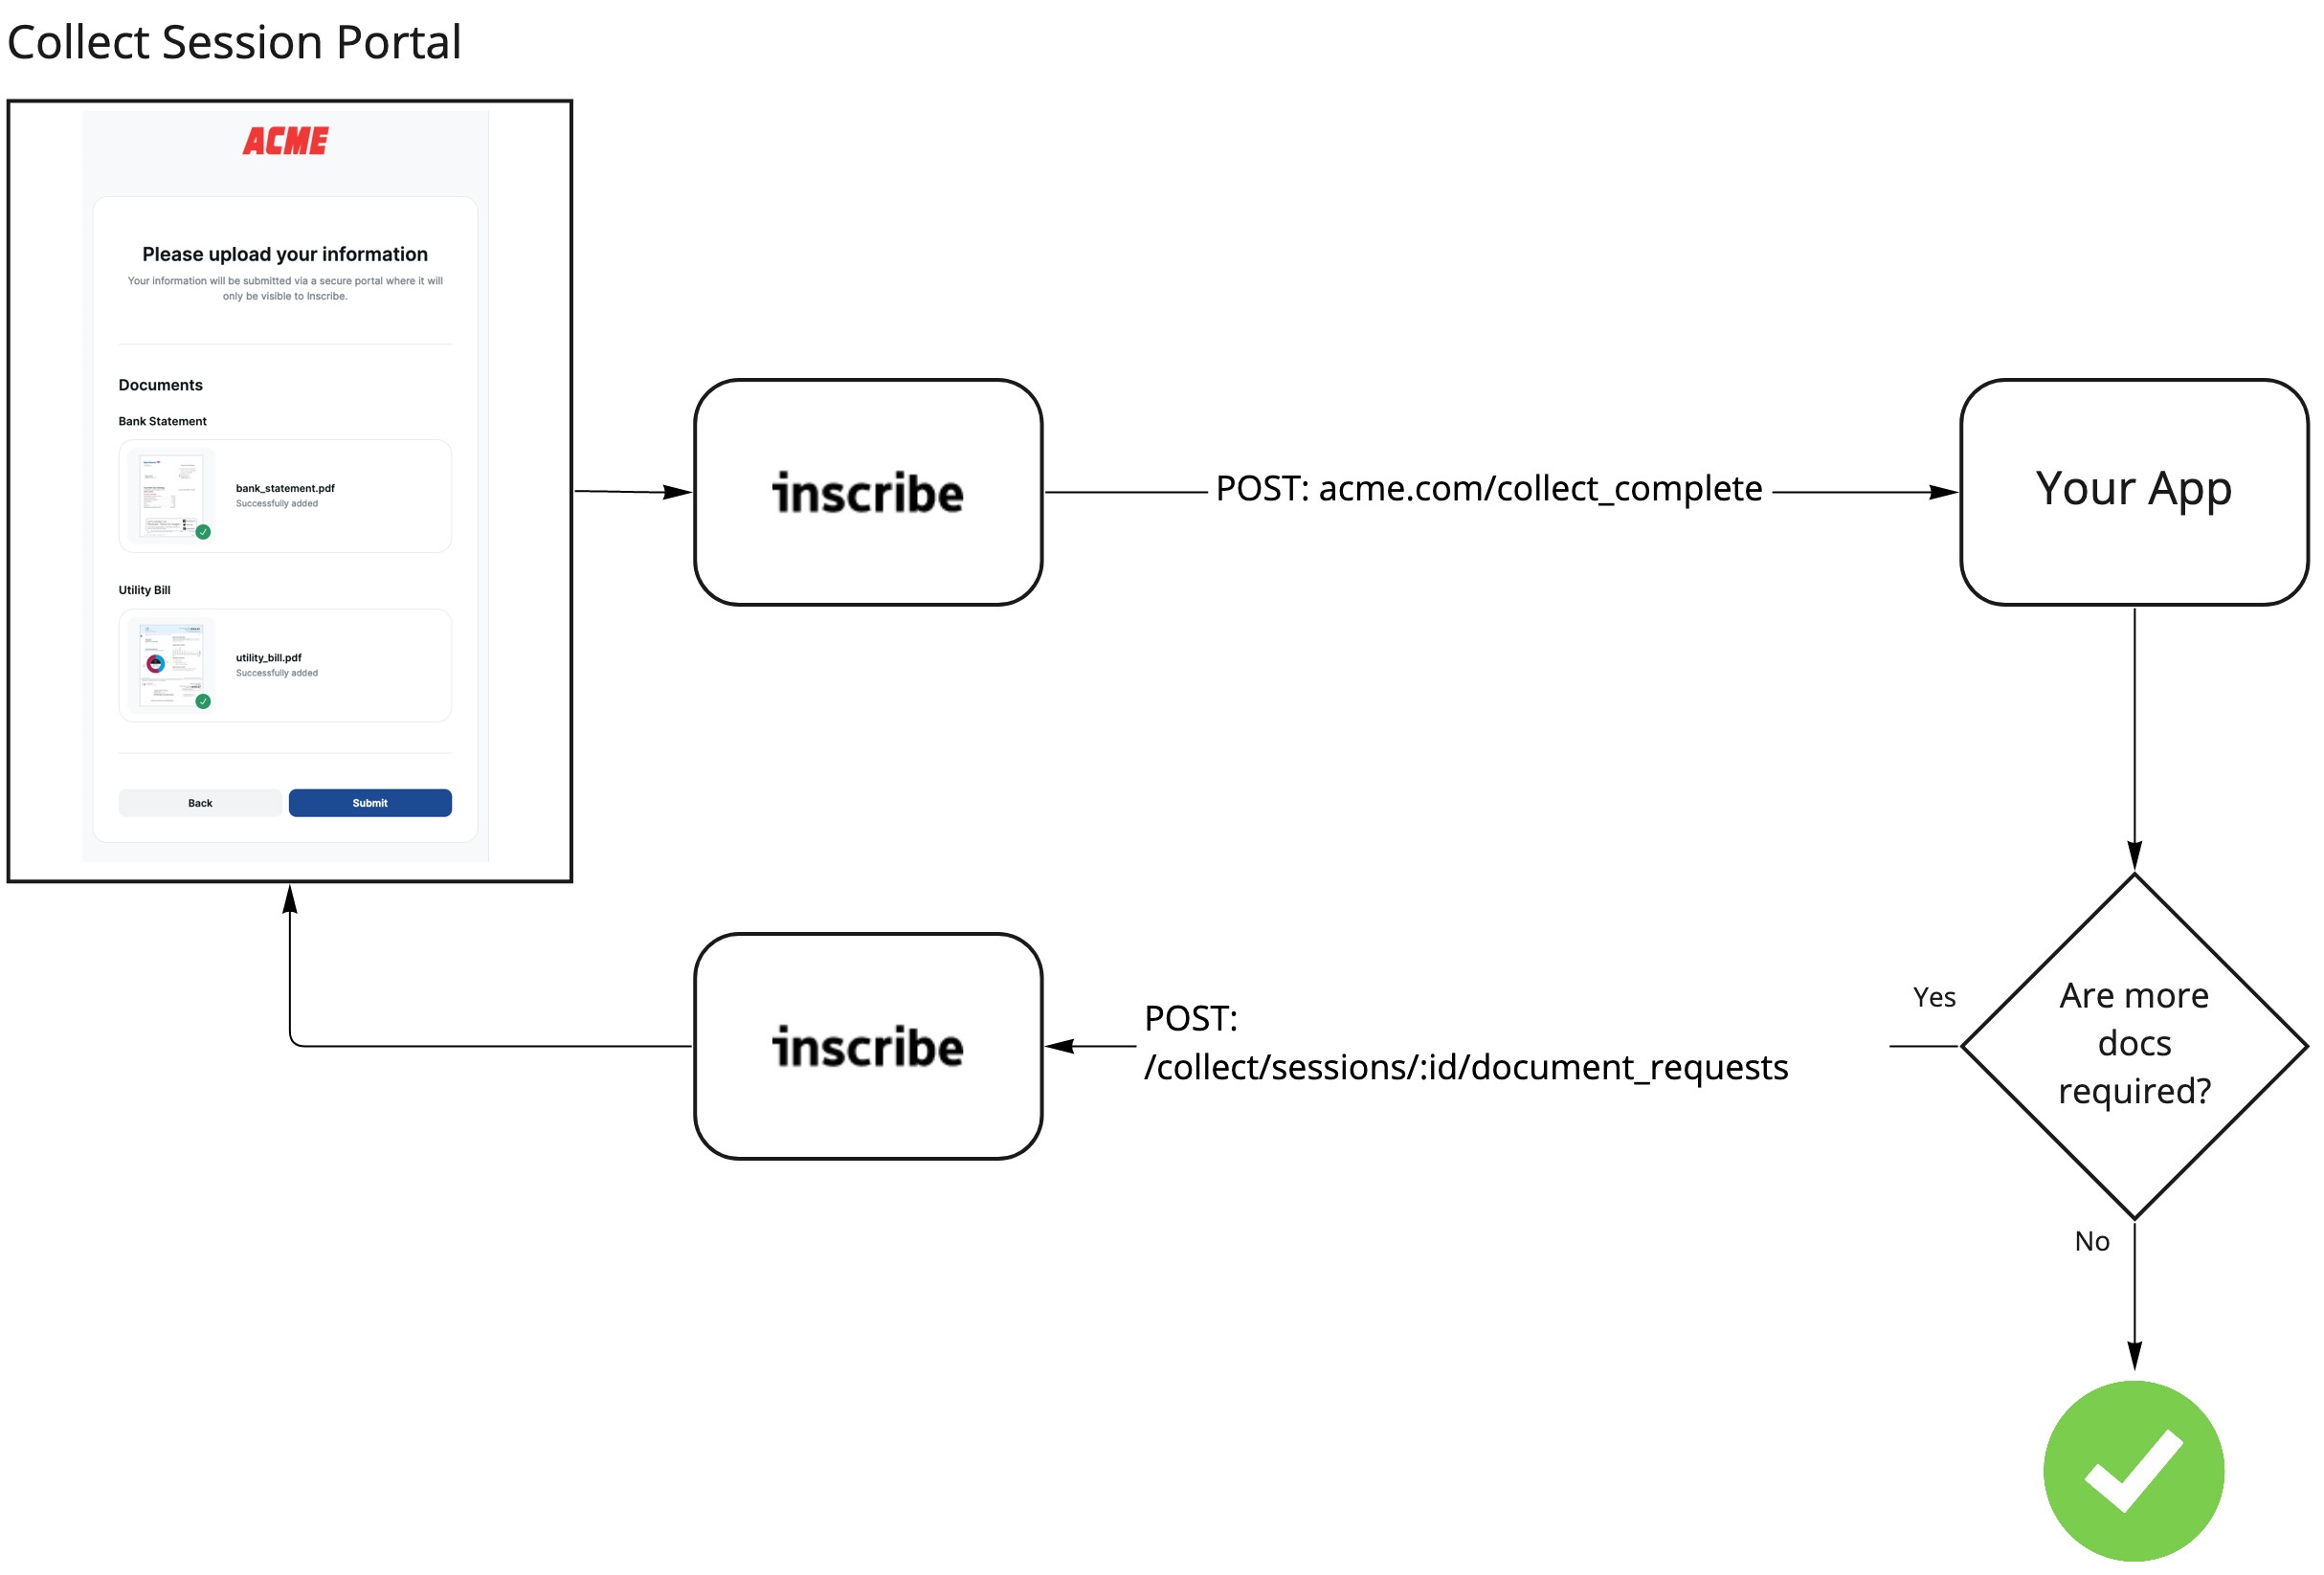
The /document_requests endpoint can be used to add new document requests to an existing session, referencing the document request by its unique id. If the session has already been completed, it will be reactivated when the new document request has been added.
[
	{
		"label": "Tax return",
		"max_documents": 3,
		"tags": [{"text": "collect_tax_return"}],
		"verify": {
      "name": "Charles Ponzi",
      "id_number": "12-1234567"
    }
	}
]
If you require a document request to be removed from a session, you can do so also using the /document_requests endpoint. This might be useful to resolve on-boarding issues during the document collection process.
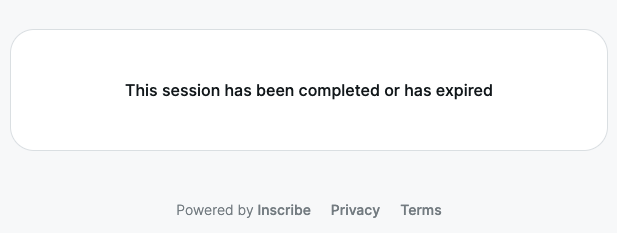
Expire a Collect Session
If a customer application has been terminated, you can expire a session using the /collect/sessions/:id endpoint.
{
  "expired": true
}
When a session is expired, the customer will be prevented from uploading documents and will be informed that the session is expired.
All data collected from the session is still kept and the session can be reactivated at any time using the /collect/sessions/:id endpoint with:
{
  "expired": false
}
Embedding Collect
You can embed a stripped-back version of Collect into an iframe by adding the embed query parameter with a value of true to the URL.
Updated 10 months ago